

Designed to Challenge Every Level
The Heritage Oaks layout rewards thoughtful golf. Water, strategic bunkering, and subtle doglegs ask for a plan on nearly every hole, while multiple sets of tees let players of all abilities find a fair and enjoyable test. Whether you're chasing a personal best or an easy afternoon round, the course meets you where your game is.
Conditioned to a Championship Standard
Lush fairways, true greens, and meticulous detail are part of everyday life at Heritage Oaks. The grounds team keeps the course in peak playing condition season after season, so every round feels like an event, from the first tee to the final putt.
Explore the Course, Hole by Hole
Click any hole below to watch a video flyover and study the overhead diagram, along with notes on how best to play it.
1Hole 1
 Tap to zoom
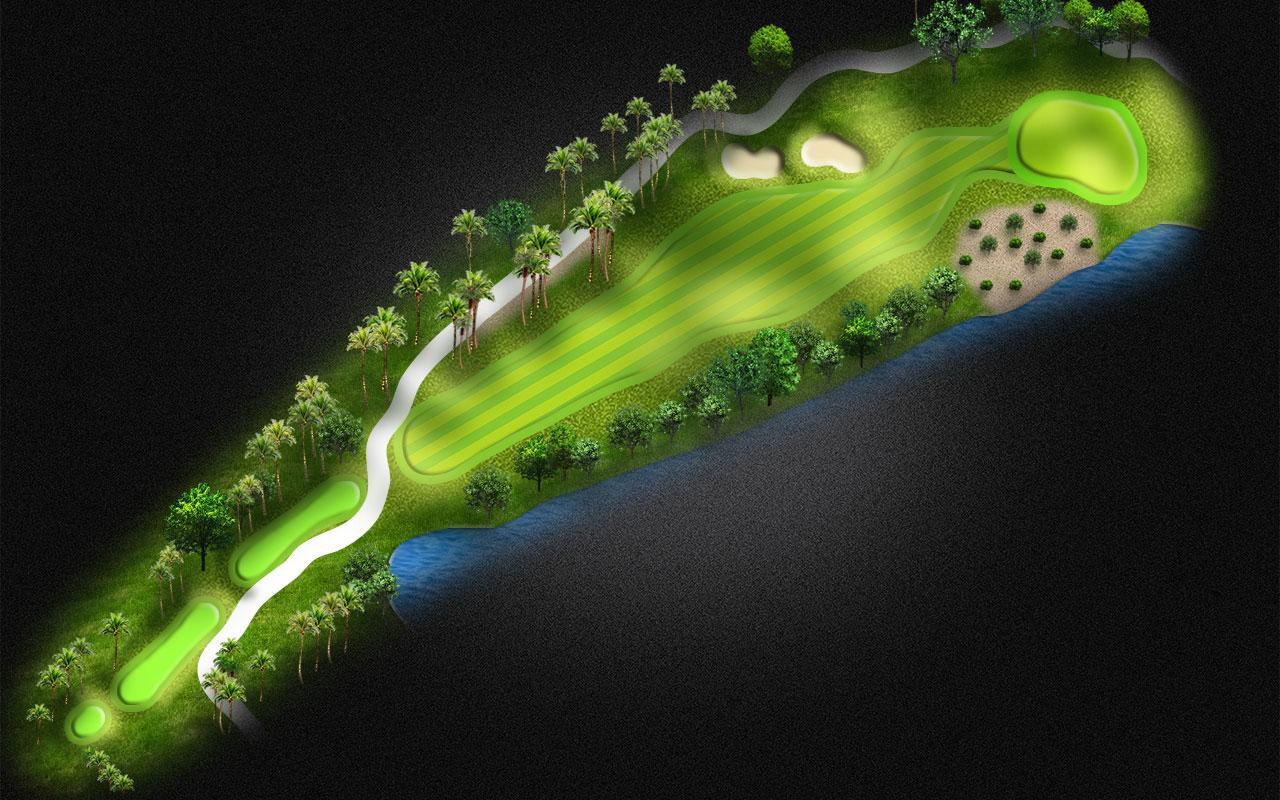
Hole #1 is a short par 4 with an approach shot that plays slightly downhill. The preferred tee shot on #1 should be slightly left of fairway center. This allows for an open approach shot into a large green that slopes from back to front. The green is protected by a large waste bunker on the right.
2Hole 2
 Tap to zoom
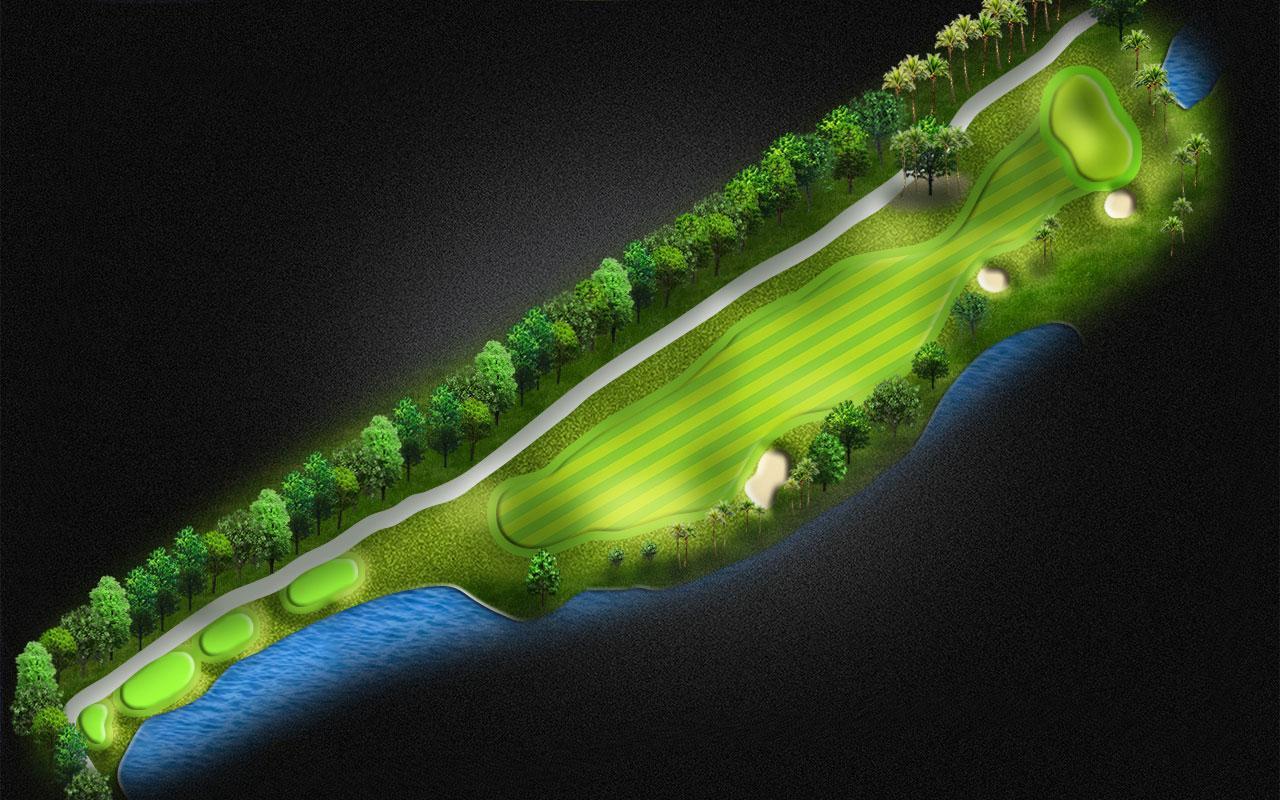
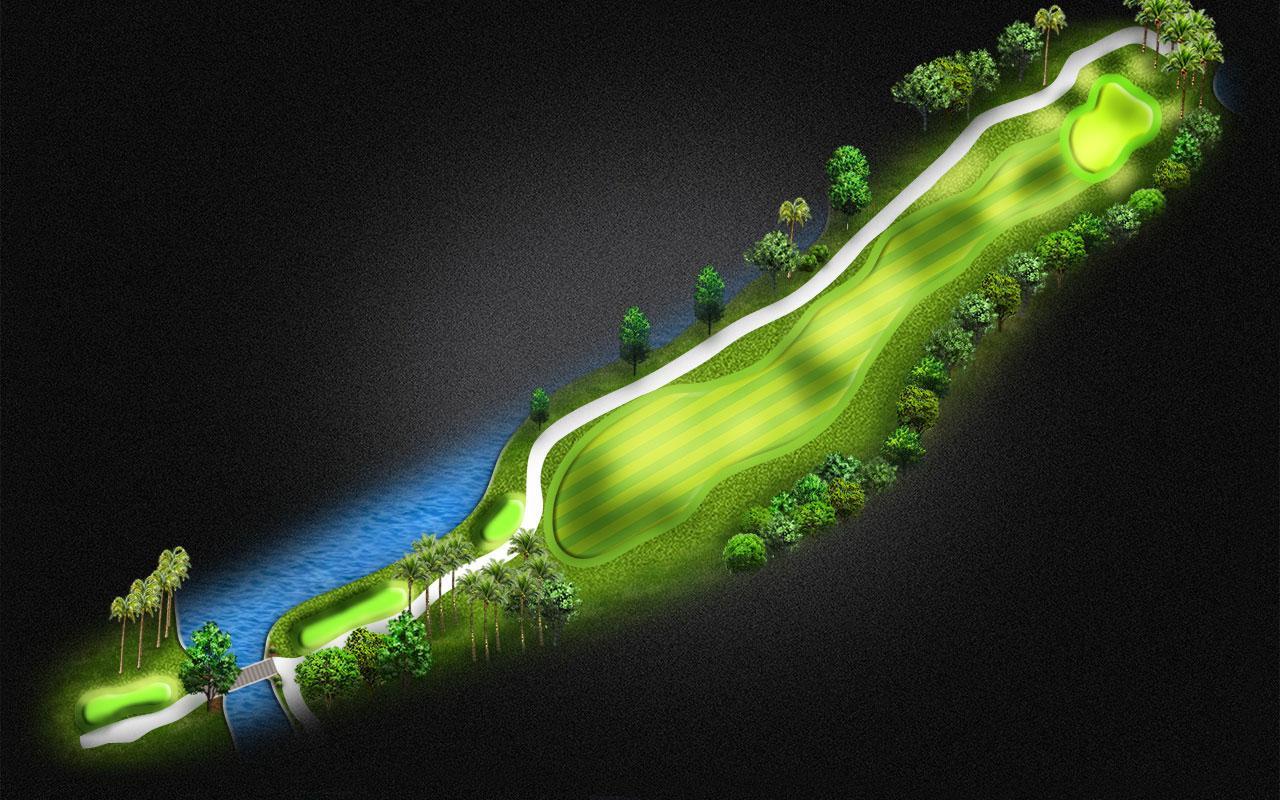
Hole #2 is a long slight dogleg left par 4 with a large fairway bunker protecting the right side of the fairway, and a bunker on the right side of the green. The left side of the fairway is protected by a series of three grass scoops and a waste area. The green is crowned in the middle and slopes significantly from the middle to both left and right. Hit tee shot long favoring the middle of the fairway.
3Hole 3
 Tap to zoom
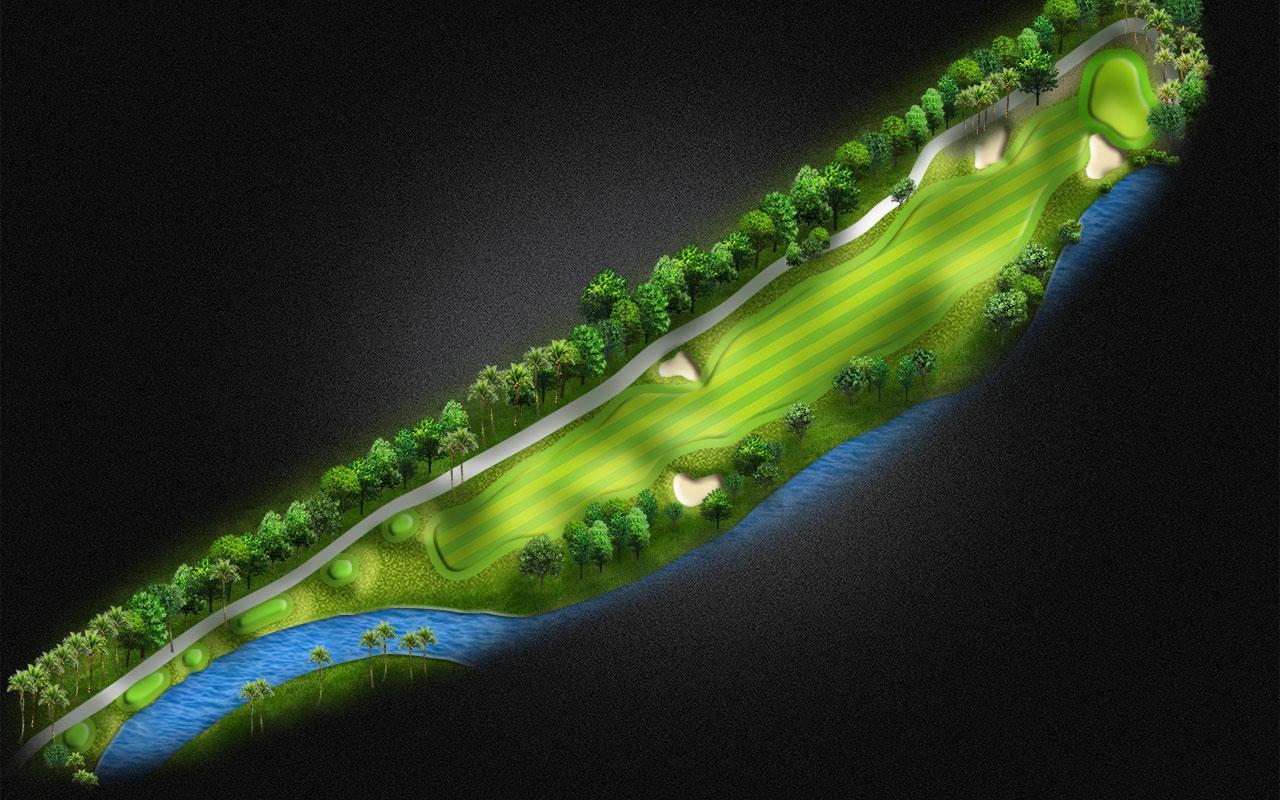
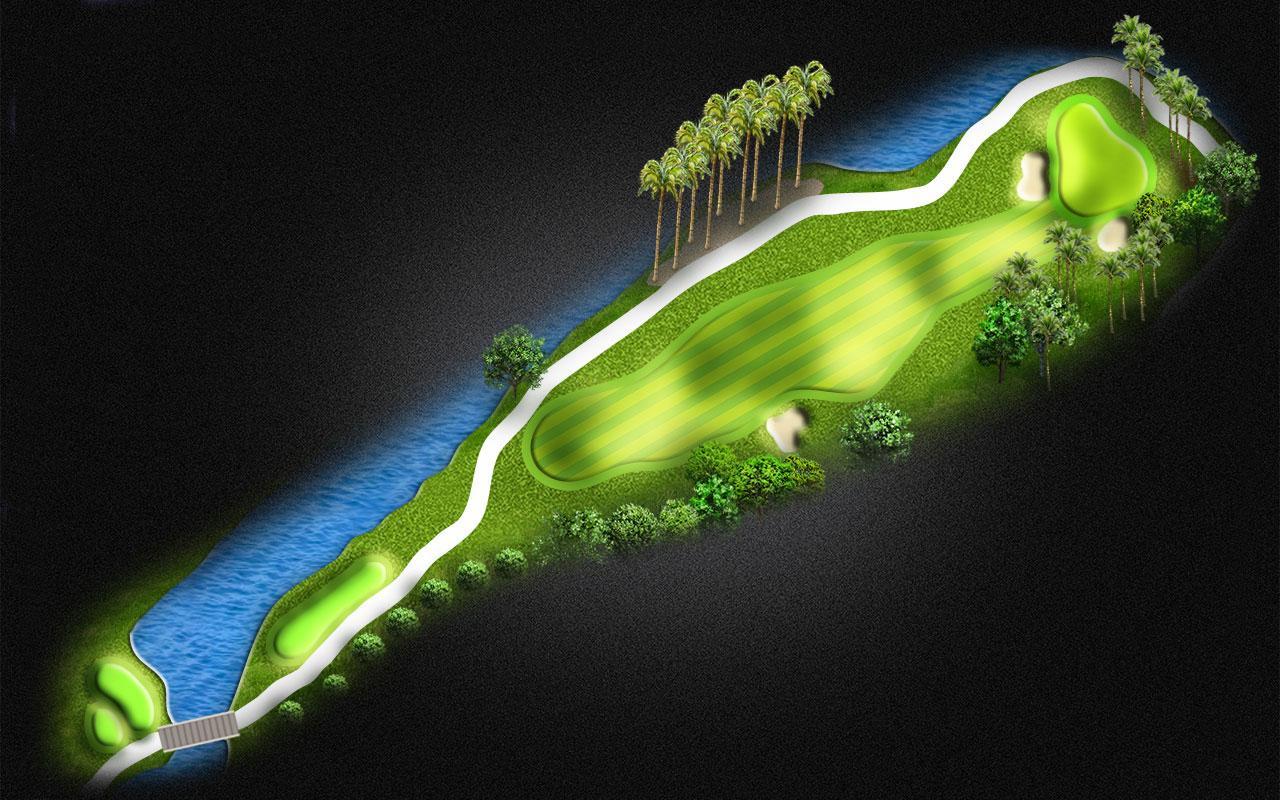
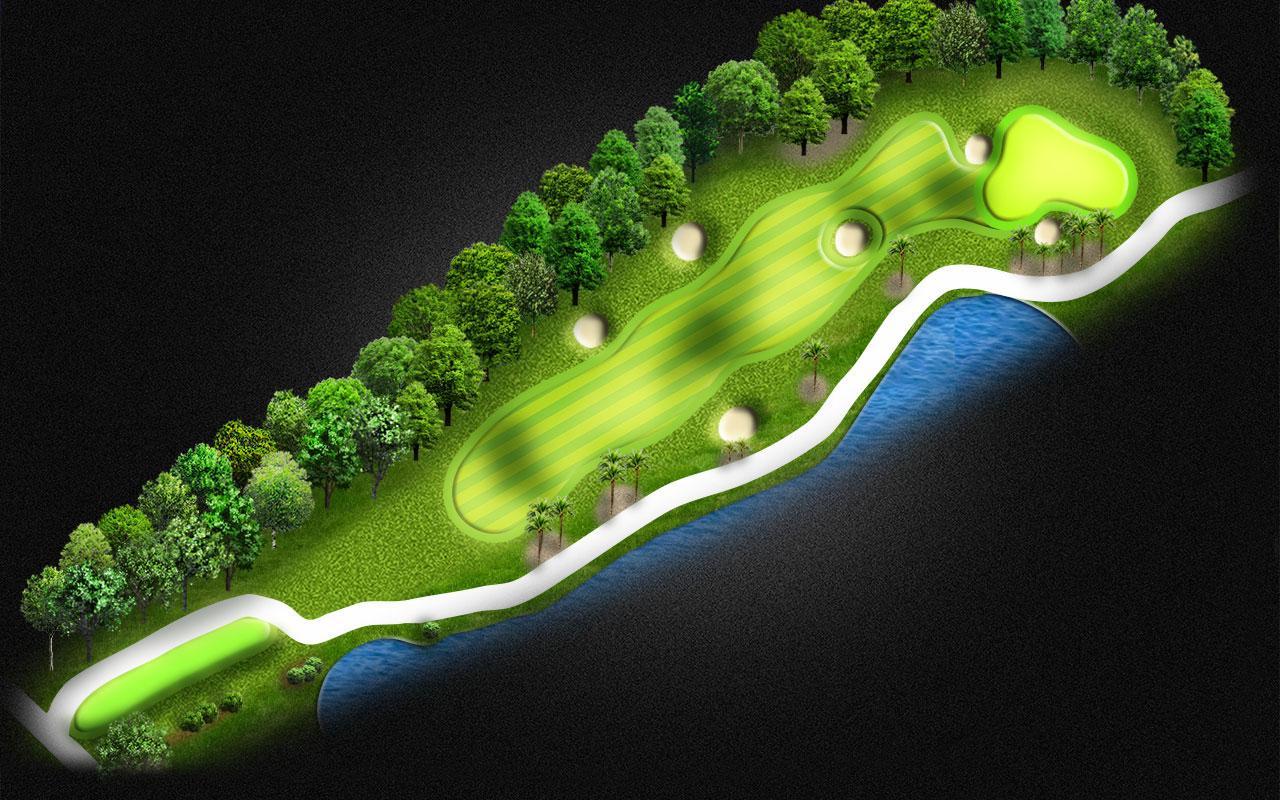
Hole #3 is a testing par 5 with bunkers on both sides of the fairway. The green is protected by a front right bunker as well as a water hazard. The left side of the green is protected by a waste area. The tee shot should be in the middle of the fairway, avoiding the lateral hazards on the right and left sides of the fairway. There is a generous landing area for the second shot. The lay-up and approach are into a slightly elevated green.
4Hole 4
 Tap to zoom
Hole #4 is a long left dogleg. It is protected from tee to green by water on the left. The green has a spine running front to back in the middle of the green. Hit the ball down the left center of the fairway avoiding the water. The approach shot needs to favor either the left or right side of the green depending on pin placement. It is important to understand the pin placement to avoid being on the wrong side of the spine.
5Hole 5
 Tap to zoom
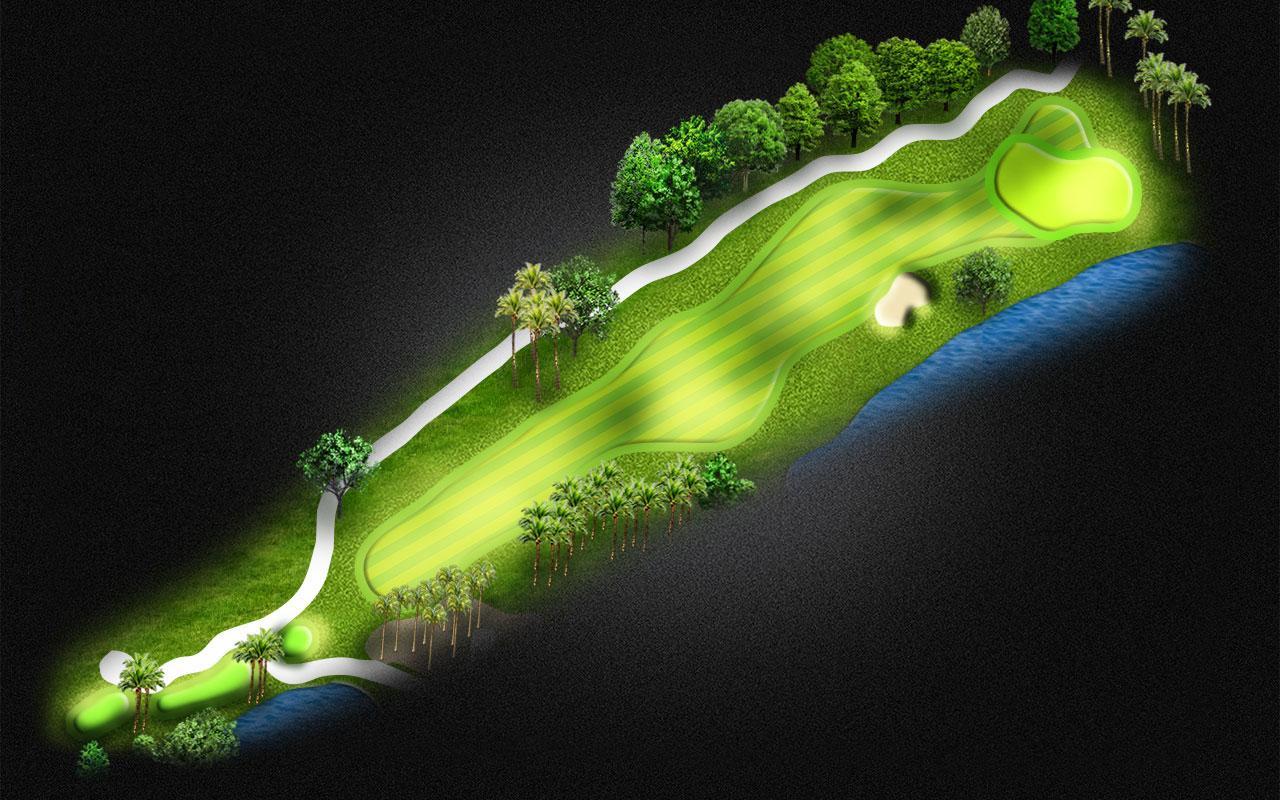
Hole #5 is a challenging par 4 with a slight dogleg to the right. The tee shot should favor the middle to left side of the fairway. The right side is very unforgiving because of the lake which runs the length of the hole. The green is slightly elevated with a false front, and is guarded by a large bunker on the left side.
6Hole 6
 Tap to zoom
Hole #6 is a par 3 with a long green running from back to front and is well protected by a pot bunker guarding the left front and a greenside bunker that wraps around the left and rear portions of the green. The tee shot on #6 should be played into the middle of the green regardless of the pin position.
7Hole 7
 Tap to zoom
Hole #7 is a short par 3 which is well protected by a large bunker short and left of the green. The tee shot should favor the right center of the green.
8Hole 8
 Tap to zoom
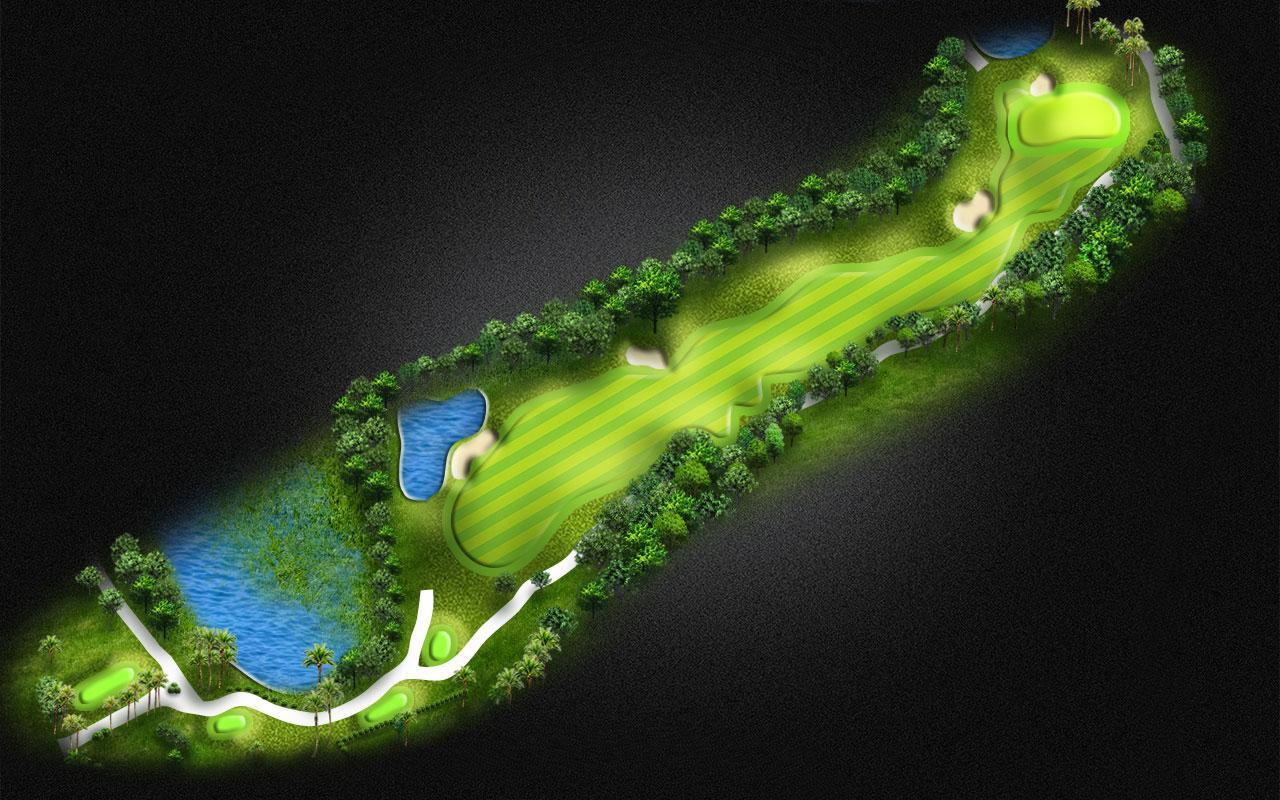
Hole #8 is a scenic par 5 that weaves through the tree line. This hole has multiple turns, mounds, and bunkers making it a test for all golfers. The tee shot should favor the middle of the fairway. There is a small pond on the left side which will catch an errant tee shot, and a nature preserve lines the entire left side of the hole. The second shot needs to be hit right of the oak tree on the left side of the fairway. The fairway bunker beyond the oak tree must also be avoided. The approach shot should be hit to keep the ball below the hole on this sloped green.
9Hole 9
 Tap to zoom
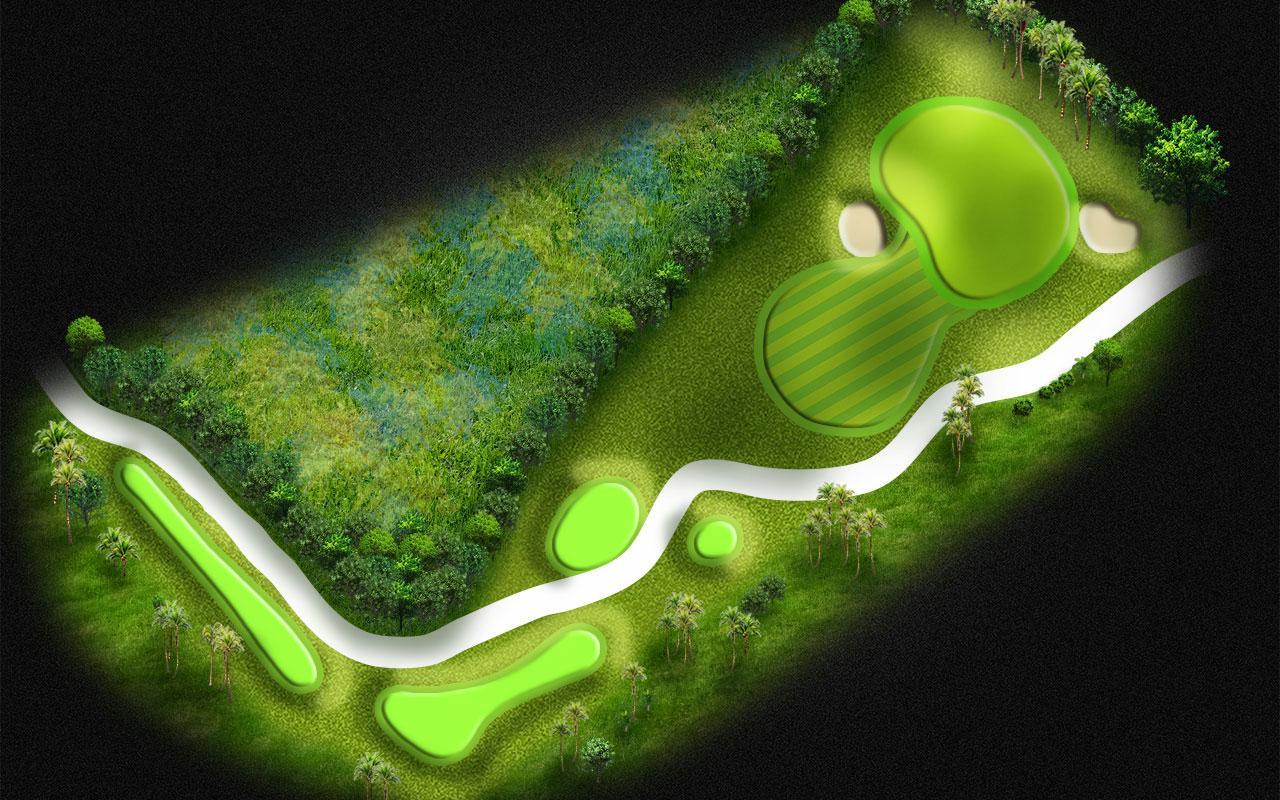
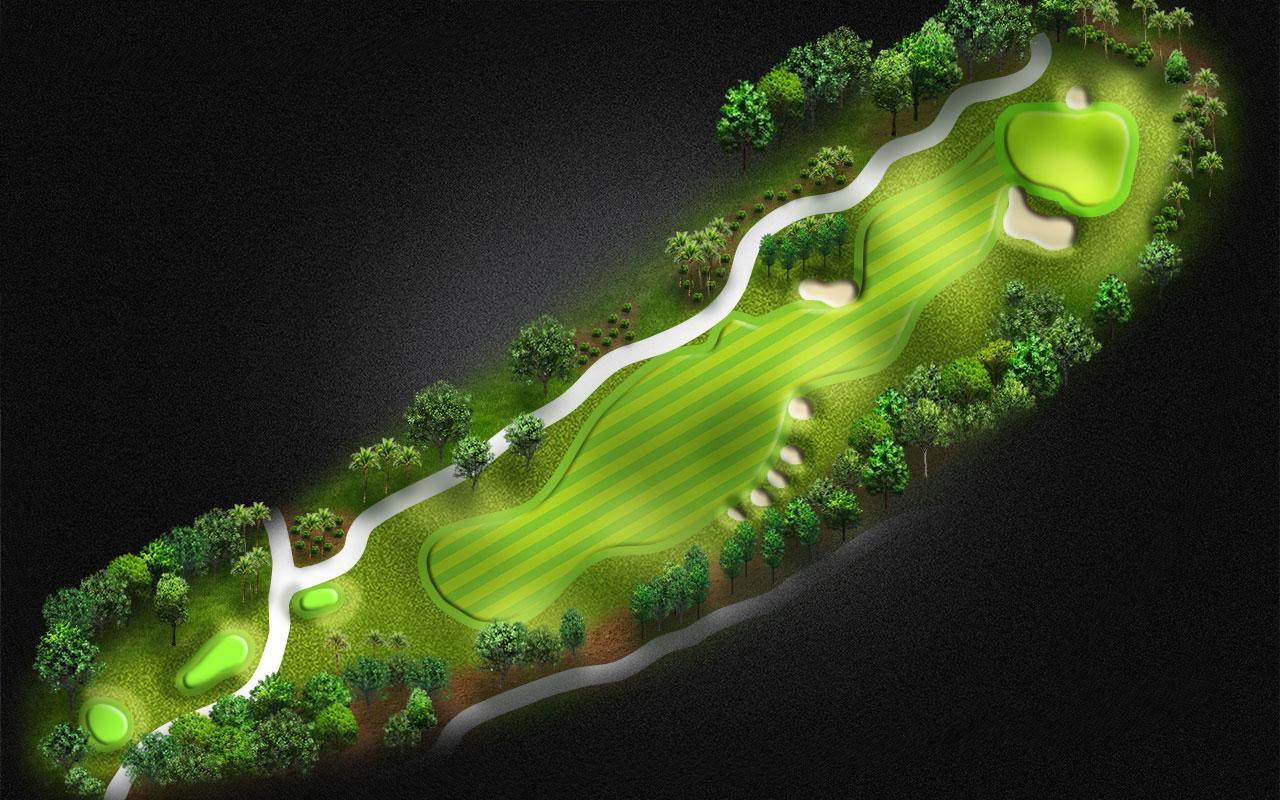
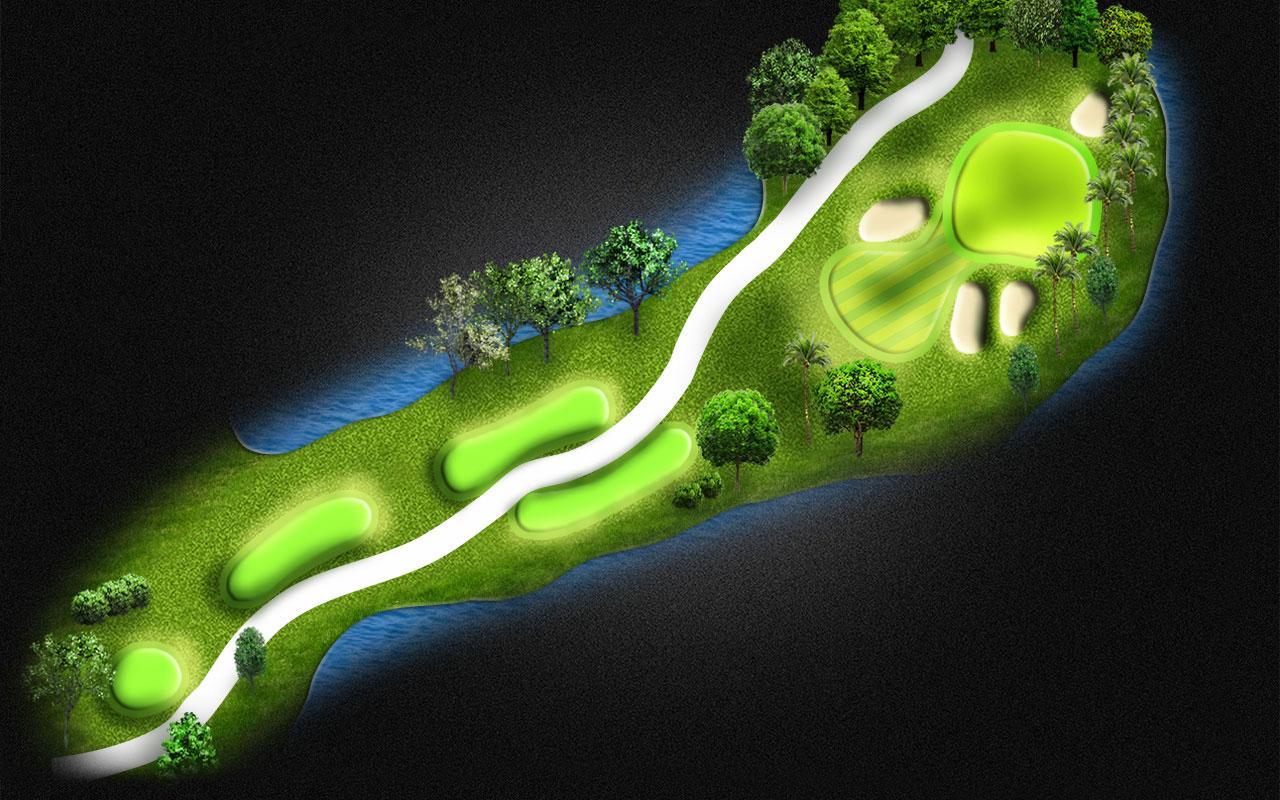
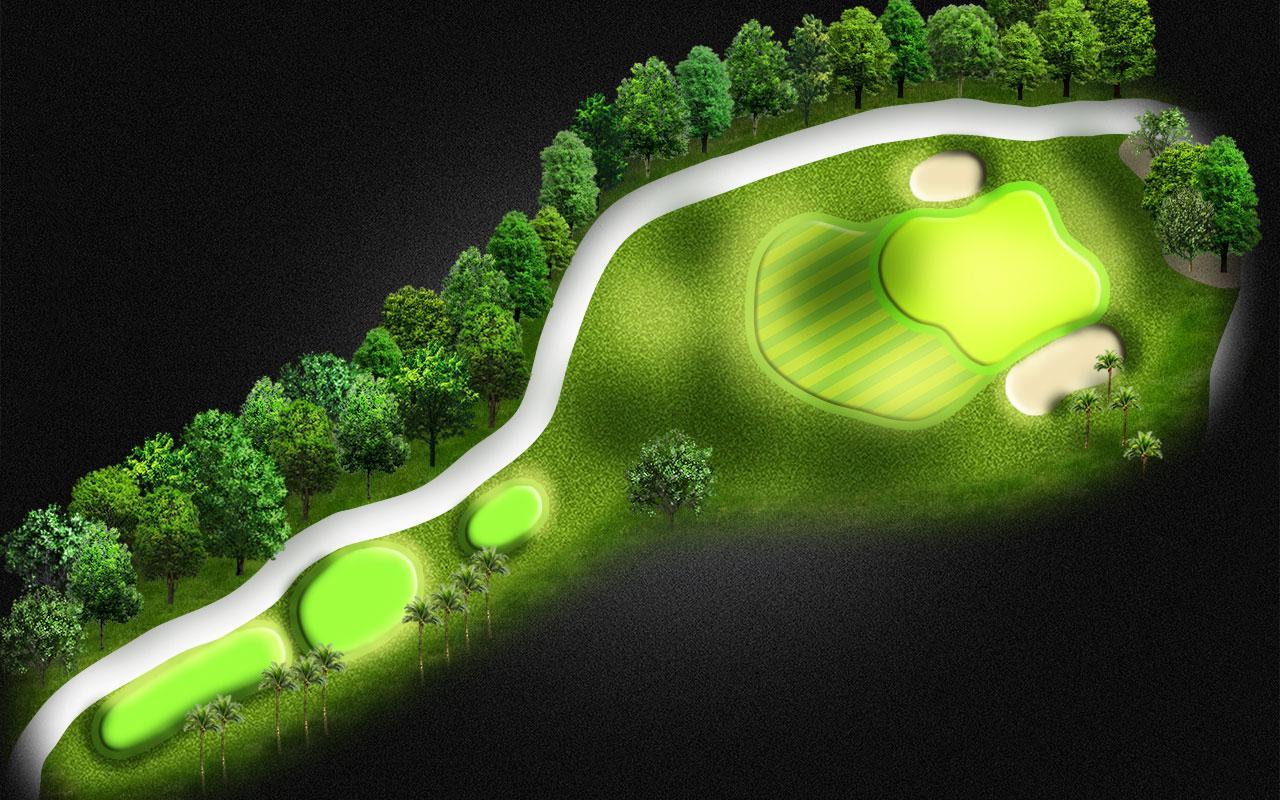
Hole #9 is a short, slight dogleg left with a series of five pot bunkers guarding the right side of the fairway. The green has excellent bunkering and significant surface contouring. The tee shot on this hole should favor the left side of the fairway, short of the five bunkers on the right. The approach shot should be hit to the middle of the green, avoiding the large bunker which surrounds the front and right side.
10Hole 10
 Tap to zoom
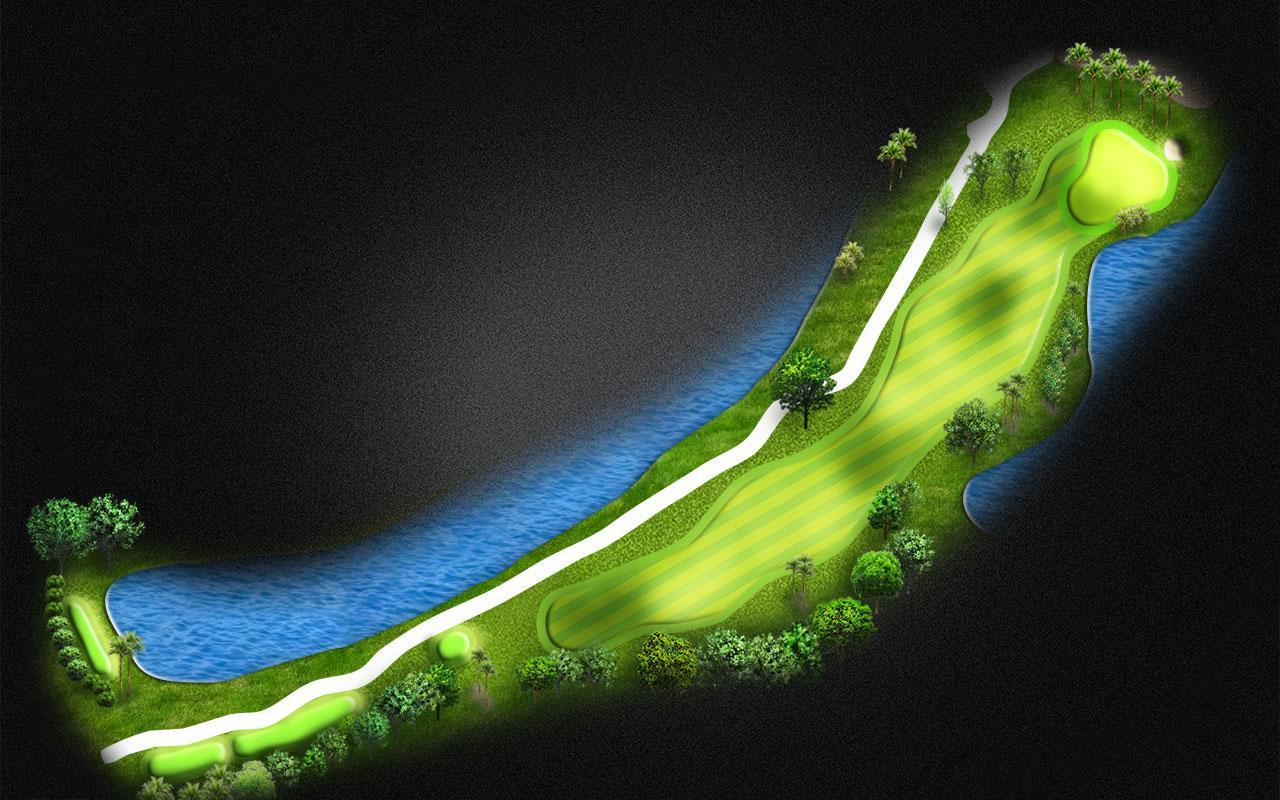
Hole #10 is a long par 4 with water on the left and out of bounds on the right. There is water on the right side of the green, and the left side is protected by a significant runoff area. The tee shot should be hit in the middle of the fairway, keeping the ball in the center to avoid the trees on the left side of the fairway. The approach shot should be hit to the middle of the green.
11Hole 11
 Tap to zoom
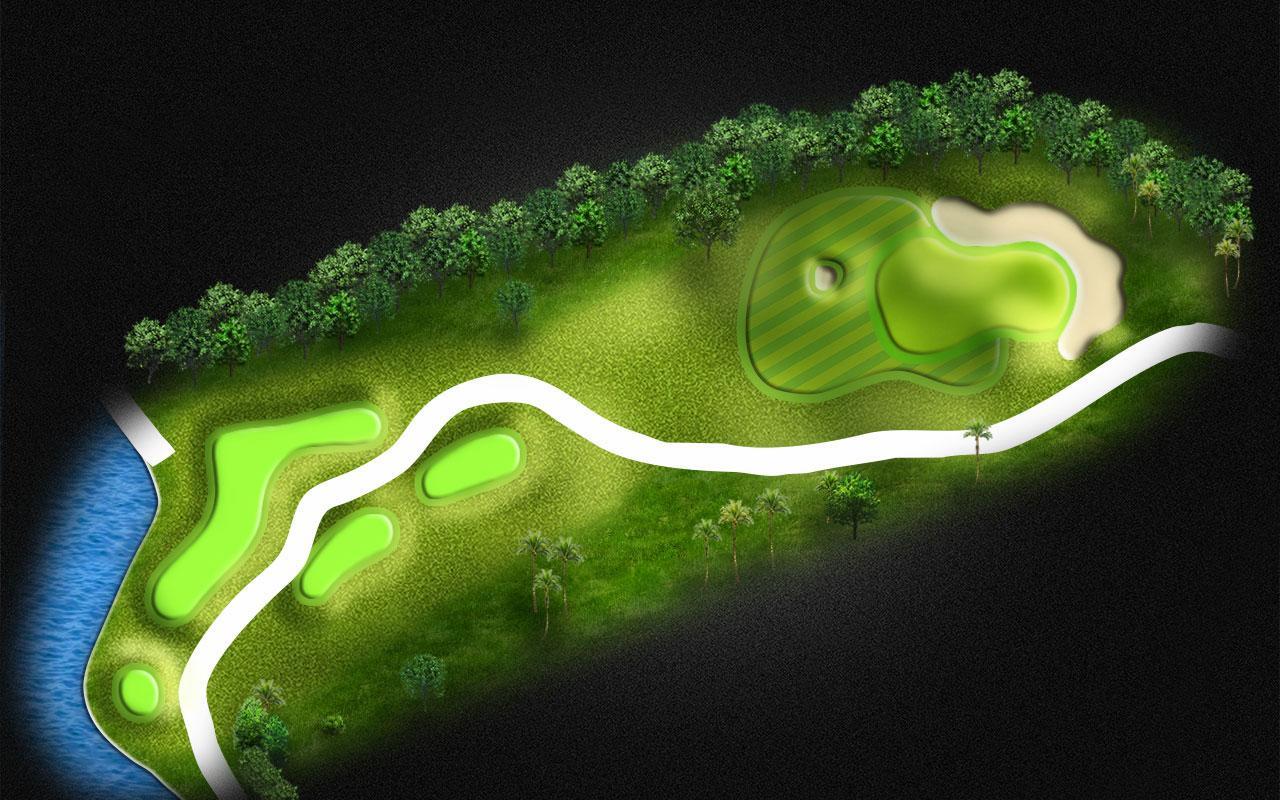
Hole #11 is a shorter par 4 which is well protected by a dense tree line on the left and a large fairway bunker on the right. The green is a very large, deep green with two distinct levels. The entire green slopes from back to front. The tee shot should favor the left center of the fairway. The approach shot should be hit to the proper level and kept below the hole. Any ball above the hole will challenge a player's putting skills.
12Hole 12
 Tap to zoom
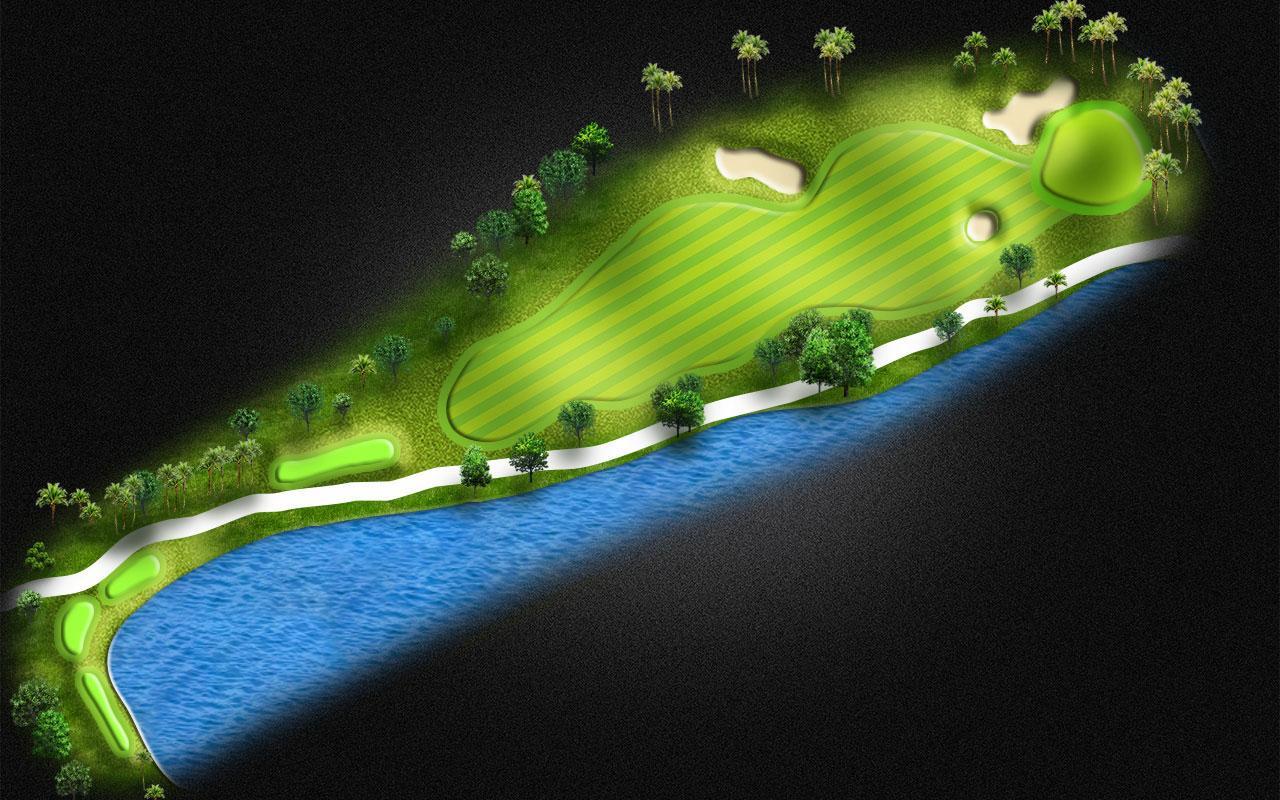
Hole #12 is a straight par 4, well protected by water the length of the hole on the left, and trees along the right side. Bunkers guard both sides of the green. The tee shot should favor the middle of the fairway, while the approach shot must be played to avoid bunkers on either side of the green.
13Hole 13
 Tap to zoom
Hole #13 is a long par 4. It is well protected by water on the left and an environmentally sensitive area the length of the hole on the right. It is critical to put the tee shot in play on this hole. The second shot is challenging because of the length of the hole, as well as the small target provided by the green.
14Hole 14
 Tap to zoom
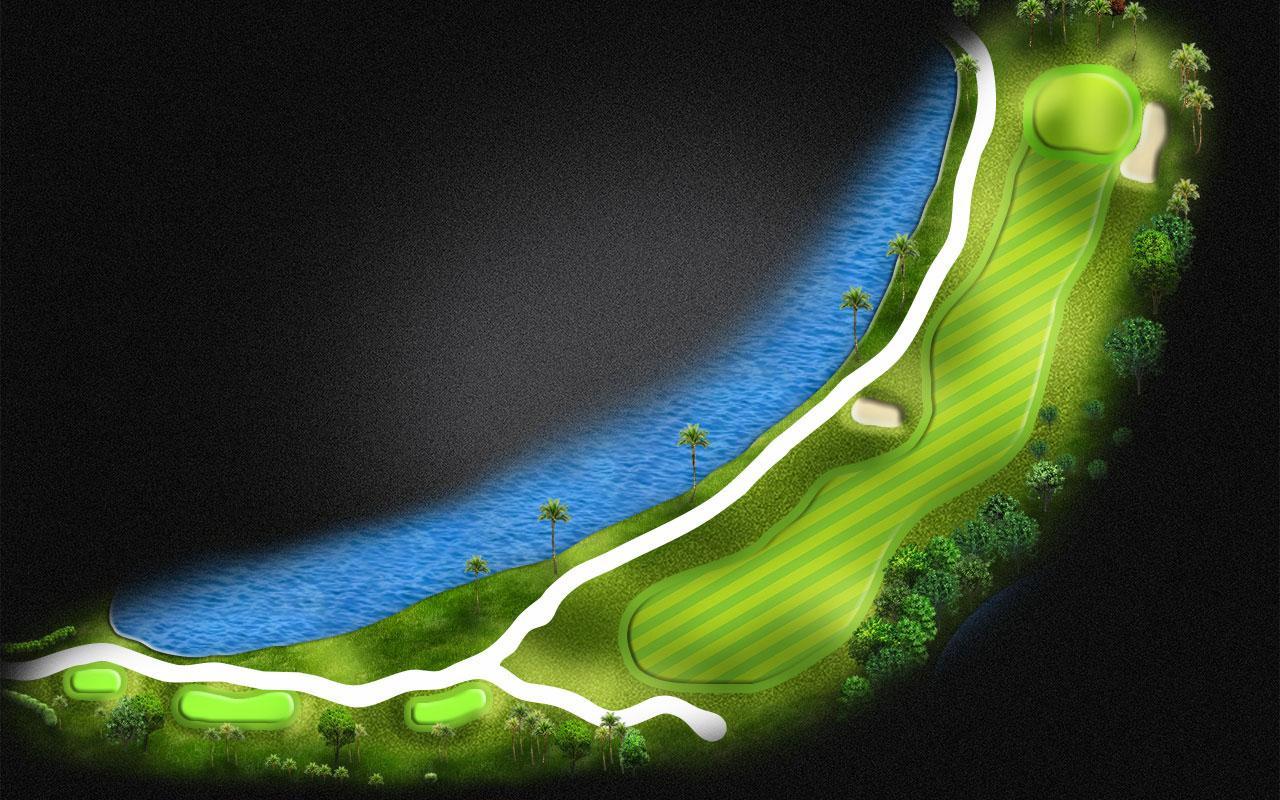
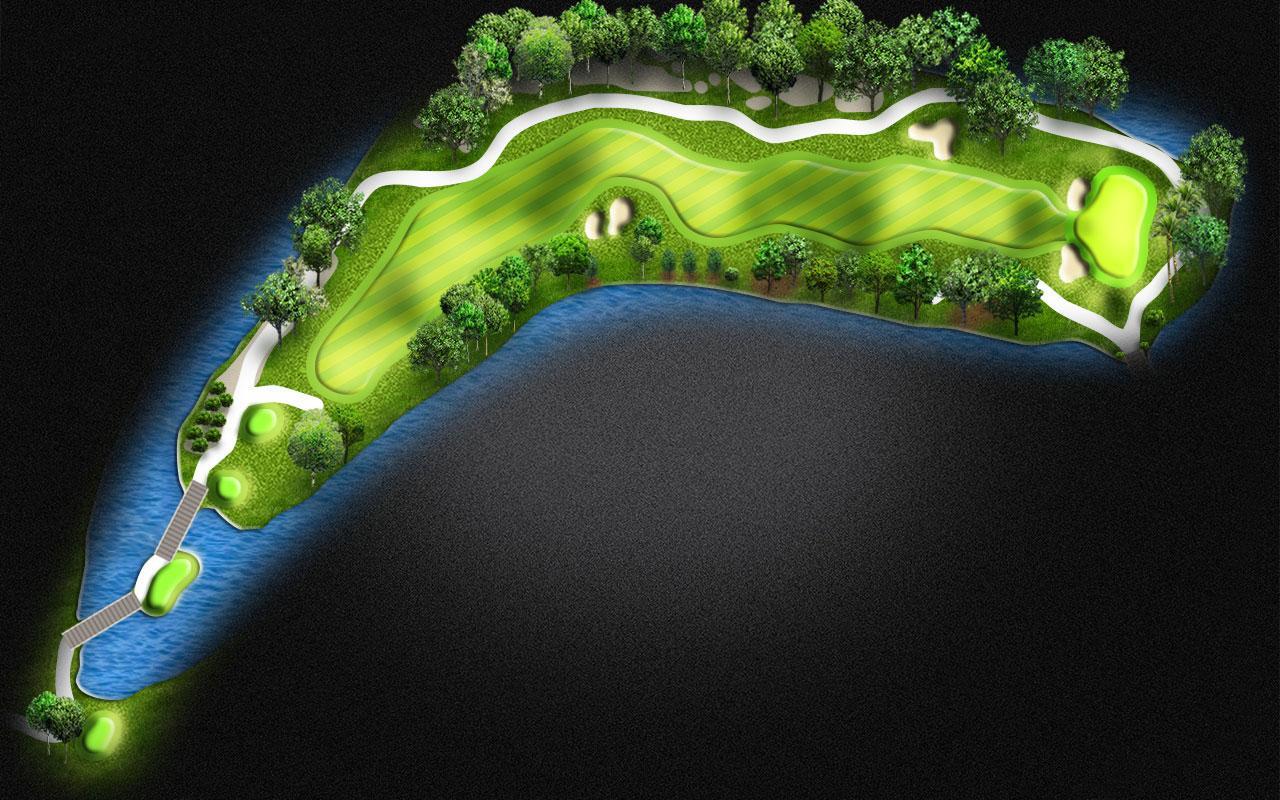
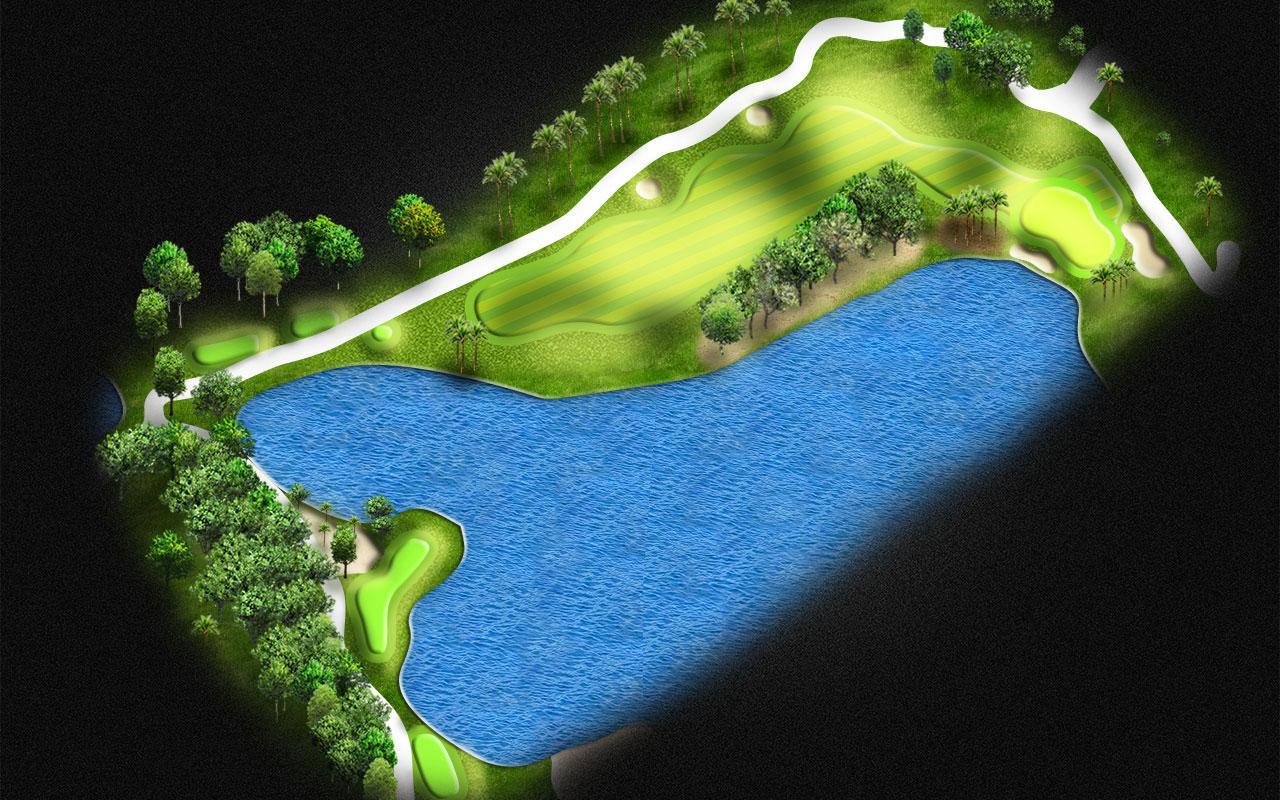
Hole #14 is one of the most scenic holes on the golf course. It is a dramatic dogleg right, and the entire hole is surrounded by water, making it an island par 5. The tee shot on this hole is critical and should be placed in the middle of the fairway. The right side of the fairway is lined with trees, and an errant tee shot leaves the player with few good options to get the ball back in play. The approach shot is slightly downhill to a large green protected by bunkers on both sides.
15Hole 15
 Tap to zoom
Hole #15 is a difficult par 3 that is protected by greenside bunkers and out of bounds. The tee shot on #15 needs to be accurate due to the small area to land the golf ball. The bunkers on the right of the green are slightly elevated making it difficult to pitch the ball close.
16Hole 16
 Tap to zoom
Hole #16 is the shortest par 4 on the course. With a lateral hazard on the left and water hugging the right side, this hole is a demanding test for all skill levels. Longer hitters will be tempted to go for the green on their tee shots. Missing the green will result in a variety of difficult shots. There are bunkers on both the right and left sides of this multi-tiered green, as well as a hazard if the shot is hit long. The best approach is to leave the ball on the proper level.
17Hole 17
 Tap to zoom
Hole #17 is a straight par 3 protected by bunkers on the right and left. The tee shot should be hit into the center of the green. The player should avoid hitting it long because of the steep drop off behind the putting surface.
18Hole 18
 Tap to zoom
Hole #18 is a dramatic left to right dogleg which is framed by a large lake with a treed waste area running the length of the hole on the right side. The approach shot into the green must be precisely hit to avoid the runoff bunker on the left and the bunker on the right. Hole #18 demands an accurate tee shot into the left middle of the fairway, avoiding the right side. If the tee shot is hit to the right side of the fairway, the approach shot into the green can be blocked out, forcing the player to carry the tree line.
Men's Tees
| Tee | Par | Yardage | Rating | Slope |
|---|---|---|---|---|
| Black | 71 | 6531 | 71.6 | 136 |
| Black/Blue | 71 | 6368 | 70.7 | 134 |
| Blue | 71 | 6214 | 69.8 | 130 |
| Blue/Silver | 71 | 5937 | 69 | 126 |
| Silver | 71 | 5738 | 68 | 123 |
| Silver/Green | 71 | 5599 | 67.3 | 120 |
| Green | 71 | 5400 | 66.2 | 118 |
| Gold | 71 | 5040 | 64.7 | 111 |
| Gold/Red | 71 | 4832 | 63.6 | 108 |
| Red | 71 | 4568 | 62.5 | 105 |
Ladies' Tees
| Tee | Par | Yardage | Rating | Slope |
|---|---|---|---|---|
| Blue | 71 | 6214 | 75.9 | 137 |
| Blue/Silver | 71 | 5937 | 74.5 | 134 |
| Silver | 71 | 5738 | 73.5 | 132 |
| Silver/Green | 71 | 5599 | 72.4 | 129 |
| Green | 71 | 5400 | 71.4 | 127 |
| Green/Gold | 71 | 5243 | 70.5 | 124 |
| Gold | 71 | 5040 | 69.2 | 119 |
| Gold/Red | 71 | 4788 | 67.7 | 117 |
| Red | 71 | 4568 | 66.3 | 114 |

Experience the Heritage Oaks Lifestyle
Come see what makes life here so easy to love.
