| Hole: 2 |
|
| Tees |
|
Yardage |
Par |
H/C |
| Black |
|
415
|
4
|
3
|
|
| Black/Blue |
|
390
|
4
|
3
|
|
| Blue |
|
390
|
4
|
3
|
|
| Blue/Silver |
|
390
|
4
|
3
|
|
| Silver |
|
375
|
4
|
3
|
|
| Silver/Green |
|
375
|
4
|
3
|
|
| Green |
|
352
|
4
|
3
|
|
| Gold |
|
343
|
4
|
3
|
|
| Gold/Red |
|
317
|
4
|
3
|
|
| Red |
|
317
|
4
|
3
|
|
| Blue |
|
390
|
4
|
9
|
|
| Blue/Silver |
|
390
|
4
|
9
|
|
| Silver |
|
375
|
4
|
9
|
|
| Silver/Green |
|
375
|
4
|
9
|
|
| Green |
|
352
|
4
|
9
|
|
| Green/Gold |
|
352
|
4
|
9
|
|
| Gold |
|
343
|
4
|
9
|
|
| Gold/Red |
|
317
|
4
|
9
|
|
| Red |
|
317
|
4
|
9
|
|
|
| Scorecard |
|
|
|
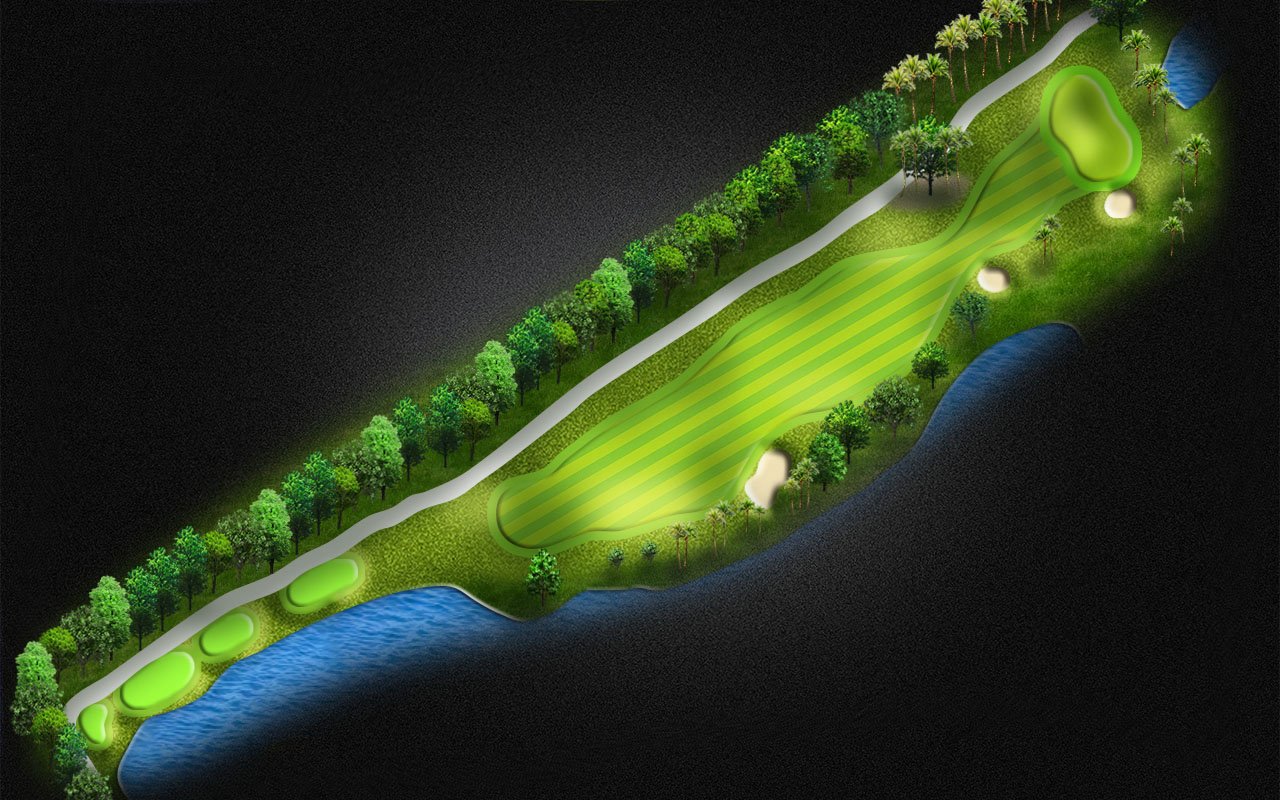
| Description: |
| Hole #2 is a long slight dogleg left par 4 with a large fairway bunker protecting the right side of the fairway, and a bunker on the right side of the green. The left side of the fairway is protected by a series of three grass scoops and a waste area. The green is crowned in the middle and slopes significantly from the middle to both left and right. |
|
| How to Play It: |
| Hit tee shot long favoring the middle of the fairway.
|
|